Why Did My Laminated Bags Fall Apart After 7 Days? Don’t Blame the Adhesive Just Yet.
Published: August 6, 2026 | Reading Time: 6 min
The Real-World Scenario That Led to This Guide
A food brand’s quality manager called in a panic: the same adhesive, the same film substrate, but their newly produced batch of full-print pouches was delaminating in the warehouse after just one week. Their plain white pouches, made with identical materials, were perfectly fine. The production team blamed the adhesive supplier. The adhesive supplier blamed the film. The film supplier blamed the printing ink.
After days of troubleshooting, the root cause was finally traced back to a seemingly minor production change: the printing press operator had increased the machine speed and lowered the drying oven temperature by 20°C to meet a tight deadline. The result? Excessive residual solvent trapped in the ink layer had silently destroyed the adhesive’s cross-linking structure, causing a delayed, pattern-specific failure.
This is not an isolated incident. In our years of providing technical support, we’ve found that peel strength degradation is one of the most misunderstood and misdiagnosed issues in flexible packaging. This guide will help you systematically differentiate between two primary failure modes—Adhesive Failure and Excessive Ink Residual Solvent—and provide a clear, actionable path to resolution.
1. Typical Phenomena of Peel Strength Degradation
Before diving into root causes, it’s crucial to recognize the three most common ways this problem manifests on the production floor or in the field:
- Post-Curing Drop: Initial peel strength passes QC immediately after lamination, but drops sharply after 24–48 hours of standard curing.
- Delayed Storage Failure: Finished bags pass factory inspection, but begin to delaminate or show bubbles at the edges or body after 7–15 days in storage or transit.
- Zonal (Pattern-Specific) Failure: Unprinted areas show strong, stable peel strength, while the printed pattern areas exhibit severe delamination. This is a critical diagnostic clue.
These differentiated symptoms are the core basis for distinguishing between the two failure modes. The table in Section 4 provides a rapid on-site checklist.
2. Mechanism Analysis: Adhesive Failure
This is the most common suspect. Adhesive failure refers to the inability of the adhesive layer to form a stable, load-bearing bond between the two substrates. The failure is typically uniform and global across the entire film web.
2.1 Core Root Causes
- Abnormal Curing Reaction: Incorrect mixing ratio of the two-component polyurethane adhesive, insufficient mixing, or expired raw materials lead to incomplete cross-linking. The adhesive remains semi-cured and weak.
- Insufficient Curing Temperature/Time: Curing room temperature is below the required standard (typically 40–50°C) or curing time is too short, preventing full cross-linking.
- Inadequate Coating Weight: The adhesive coating is too thin (< 1.8 g/m² for solvent-based systems) to fill micro-gaps on the film surface, resulting in discontinuous bonding points.
- Poor Substrate Surface Tension: Substrate surface tension below 38 dynes/cm, or contamination with dust, oil, or moisture, prevents proper adhesive wetting.
2.2 Key Identifying Characteristics
- Uniformity: Failure is global; peel strength is poor on both printed and unprinted areas.
- Peel Interface: Cohesive failure within the adhesive layer. After peeling, adhesive residue is visible on both substrate surfaces.
- Visual Appearance: No bubbling or odor. The film may feel generally limp or soft.
3. Mechanism Analysis: Excessive Ink Residual Solvent
This is the hidden killer that is frequently misdiagnosed as adhesive failure. The root cause lies in the printing process, not the lamination process. Residual solvents trapped in the ink layer migrate into the adhesive during curing, attacking and destroying its cross-linked structure. This failure is always pattern-specific and delayed.
3.1 Core Root Causes
- Inadequate Printing Drying: Insufficient drying tunnel temperature, poor airflow, excessive printing speed, or excessively thick ink layers prevent complete solvent evaporation during printing.
- Solvent Penetration: Residual solvents (e.g., ethyl acetate, ethanol) are sealed between the ink and adhesive layers. During curing and storage, they slowly migrate, dissolving and weakening the adhesive’s cross-linking network.
3.2 Key Identifying Characteristics
- Uniformity: Failure is highly regional; only the printed areas are affected. Unprinted areas remain strong.
- Peel Interface: Interfacial failure between the ink and adhesive. After peeling, there is no adhesive residue on the ink layer, and it may appear matte or powdery.
- Visual Appearance: Slight solvent odor, and possible local small bubbles or fogging in the printed areas.
- Timing: Often appears 3–7 days after finished product storage, showing delayed failure characteristics.
4. On-Site Rapid Judgment Checklist
For production and quality teams, here is a practical checklist to quickly screen for the root cause in under 10 minutes.
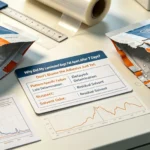
| Diagnostic Criteria | Adhesive Failure | Residual Solvent Failure |
|---|---|---|
| Failure Uniformity | Global; entire film strength is low | Regional; only printed areas weak |
| Peeled Interface | Adhesive residue on both substrate surfaces (cohesive split) | No residue on ink layer (interface split) |
| Auxiliary Signs | No odor, no bubbles | Solvent odor, local bubbles in printed areas |
| Time of Occurrence | Often during or immediately after curing | Delayed (3–7 days after storage) |
5. Targeted Process Optimization & Preventive Solutions
5.1 Solutions for Adhesive Failure
- Standardize Adhesive Mixing: Strictly follow manufacturer-specified ratios. Use precision scales. Mix thoroughly for at least 3 minutes. Use mixed adhesive promptly to avoid pot-life issues.
- Stabilize Curing: Maintain a curing room temperature of 40–45°C. Ensure curing time is ≥24 hours for standard films and ≥48 hours for high-barrier/thicker structures.
- Control Coating Weight & Substrate Quality: For solvent-based adhesives, maintain a coating weight of 1.8–2.5 g/m² (for solvent-free systems, target 1.2–1.8 g/m²). Verify substrate surface tension is ≥38 dynes/cm before production.
5.2 Solutions for Excessive Residual Solvent
- Optimize Printing Drying: Use a zoned drying tunnel temperature profile: Front Zone (50–55°C), Middle Zone (60–65°C), Rear Zone (55–60°C). Reduce printing speed for thick, solid ink coverage.
- Control Ink Usage: Use inks specifically designed for low residual solvent. Avoid excessive dilution. Regularly replace aged ink and clean the printing roller/scraper.
- Implement a Pre-Lamination Resting Step: After printing, allow the film to rest in a ventilated area for 2–4 hours to allow residual solvents to further evaporate before lamination.
- Regular Testing: Implement residual solvent testing (GC-MS) on printed semi-finished goods each shift. Control total residual solvents to < 5 mg/m².
6. Summary: A Final, Actionable Takeaway
Peel strength degradation is not solely an adhesive quality issue; it’s a systematic process problem. The key to resolution lies in precise diagnosis:
- If it’s uniform, global failure → Look at adhesive mixing, curing, and coating weight.
- If it’s regional, pattern-specific failure → The culprit is almost certainly excessive residual solvent from the printing process.
Still Unsure? Let’s Diagnose It Together.
If you’re facing unexplained peel strength degradation or delayed delamination, you don’t have to guess. Our technical lab team can help you get to the bottom of it.
Free Sample Analysis Offer: Simply send us a 20cm sample of your delaminated film. We will conduct an FTIR (Fourier-transform infrared spectroscopy) and GC-MS (Gas chromatography–mass spectrometry) analysis to identify the root cause and provide a detailed, actionable report—within 48 hours, at no cost to you.
Contact our technical support team today:
Email: joy@flexfilmpack.com
Phone: +86-191-0648-3509
Message us for more information